Extension Hair Installation Timeline: Consultation to First Wash
Extension Hair Installation Timeline is an essential guide for anyone considering hair extensions. Understanding each step, from consultation to your first wash, ensures a smooth, damage-free experience and helps you achieve flawless results.
Consultation and Hair Assessment
The first step in your extension hair installation timeline is a detailed consultation. During this session, a professional stylist will assess your hair type, texture, and condition. This is the time to discuss your desired length, volume, and style. The stylist may also examine your scalp health to determine if your hair is strong enough to support extensions. A thorough consultation helps prevent potential damage and ensures you choose the best extension method for your hair.
Choosing the Right Extension Method
Not all hair extensions are created equal. Depending on your hair type and lifestyle, your stylist may recommend tape-ins, keratin bonds, clip-ins, sew-ins, or micro-beads. Each method has a unique timeline and maintenance requirements. Tape-ins are quick to install but need regular repositioning every 6–8 weeks. Keratin bonds require heat application and professional removal. Clip-ins offer temporary results without commitment. Understanding these options is crucial for planning the installation process effectively.
Pre-Installation Hair Preparation
Before installation, your natural hair needs to be clean, dry, and free of heavy products. Stylists often recommend washing your hair 24–48 hours prior without applying conditioners or oils that could prevent extensions from adhering properly. Pre-installation care might also include trimming split ends, deep conditioning treatments, and detangling. Healthy hair ensures that extensions last longer and look natural.
Scheduling Your Appointment
Extension hair installation can take anywhere from 1–6 hours depending on the method and the number of extensions. For first-time clients, it’s wise to schedule a longer appointment to accommodate consultation, preparation, and installation. Busy salons often require booking weeks in advance, so plan accordingly. Some methods, like sew-ins or full-head keratin bonds, demand more time, while partial tape-ins or clip-ins are faster.
Sectioning and Application
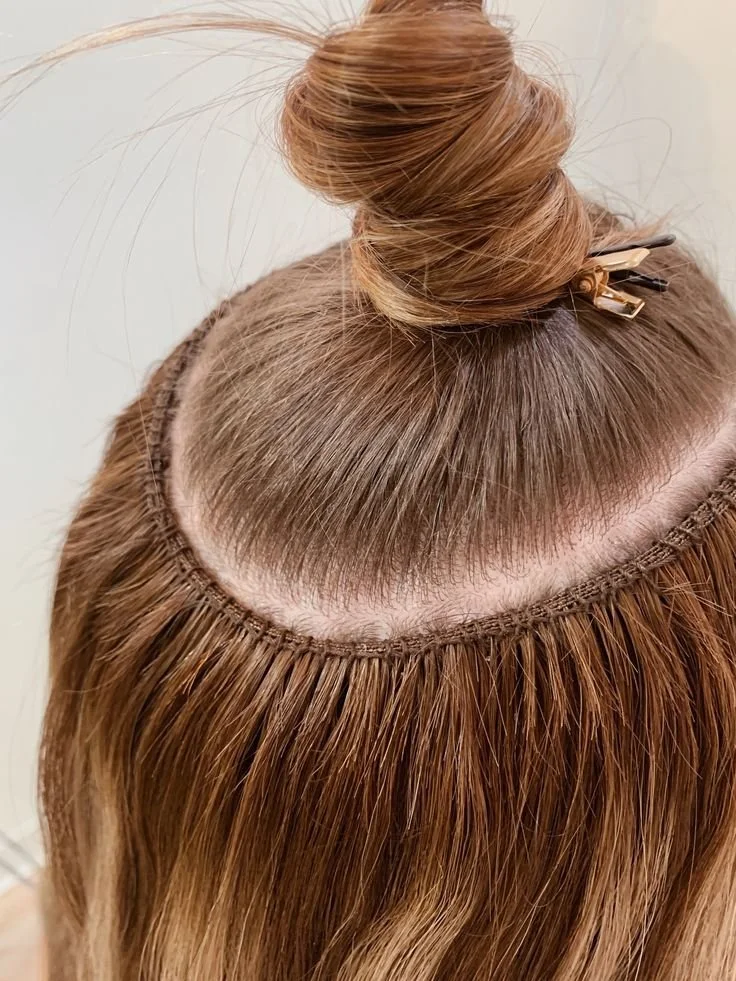
Once you arrive at the salon, the stylist will section your hair for precise application. Sectioning is a critical step in the extension hair installation timeline because it ensures even distribution and prevents strain on your natural hair. Extensions are applied row by row, starting from the nape and working upwards. Depending on the method, the stylist may use adhesive, beads, or heat to attach the extensions securely. This process can be meticulous, especially for first-time installations.
Blending and Styling
After the extensions are installed, the stylist will trim and blend them with your natural hair. This step is vital to achieving a seamless look. Extensions should match your hair texture and movement to appear natural. Stylists may use layering techniques or texturizing shears to ensure that your new length integrates smoothly. Once the blending is complete, your hair is ready for styling. Curling, straightening, or braiding may be applied carefully to avoid stressing the bonds.
Immediate Post-Installation Care
Following the installation, it’s important to follow your stylist’s aftercare instructions. Avoid washing your hair for 48 hours, and refrain from applying heavy oils or styling products near the bonds. Sleeping with a loose braid or ponytail is recommended to prevent tangling. Brushing should be done gently with a specialized extension brush, starting from the tips and working upwards. Proper care at this stage significantly influences the longevity of your extensions.
First Wash Timeline
The first wash is a milestone in the extension hair installation timeline. Typically, you should wait at least 48 hours post-installation to wash your hair. Use a sulfate-free shampoo and a lightweight conditioner to maintain bond integrity. Avoid vigorous rubbing or pulling on the extensions. Pat dry or air-dry when possible, as excessive heat can weaken adhesive or keratin bonds. The first wash sets the tone for your extension maintenance routine and helps you adapt to the new hair length and volume.
Maintenance and Follow-Up Appointments
Extensions require regular upkeep to maintain their appearance and prevent damage. Depending on the method, follow-up appointments may be needed every 4–8 weeks for repositioning, tightening, or replacing extensions. Regular maintenance includes detangling, washing with recommended products, and avoiding harsh chemicals. Your stylist may also provide a timeline for deep conditioning treatments and trimming to keep both your natural hair and extensions healthy.
Troubleshooting Common Issues
Even with careful installation, some issues may arise. Extensions can slip, tangle, or mat if not properly cared for. It’s important to recognize early signs of stress on your natural hair and address them immediately. Consulting your stylist promptly for adjustments can prevent long-term damage. Knowing the timeline for intervention—whether it’s tightening, reapplication, or trimming—is a key part of the extension hair installation process.
Lifestyle Considerations
The extension hair installation timeline also depends on your daily habits. Active lifestyles, swimming, or frequent heat styling may require special attention. Protective styles, silk pillowcases, and limiting heat exposure can extend the life of your extensions. Planning around vacations, special events, or seasonal changes ensures your extensions remain flawless and manageable.
Conclusion: Enjoying Your New Look
By following the extension hair installation timeline carefully, from consultation to your first wash and beyond, you can enjoy a beautiful, natural-looking transformation. Understanding each step helps you maintain healthy hair, prevent damage, and maximize the lifespan of your extensions. Whether it’s for added volume, length, or style versatility, adhering to this timeline ensures a stunning result you can feel confident in.


